
Pollinators, like solitary native bees, are welcome garden guests living in bee hotels. Some bee hotels sold online work better as cute garden decor or creative gifts. Many are shallow or are built as a one-size-fits-all BUG hotel, rather than a proprietary bee hotel design. Don’t take me wrong, the designs are really creative, but they could do more to support valuable bees like the mason bee and leaf cutter bee.
Using the best research-based information from multiple universities, this guide highlights bee hotel design fixes for the outer box and the nesting material within.
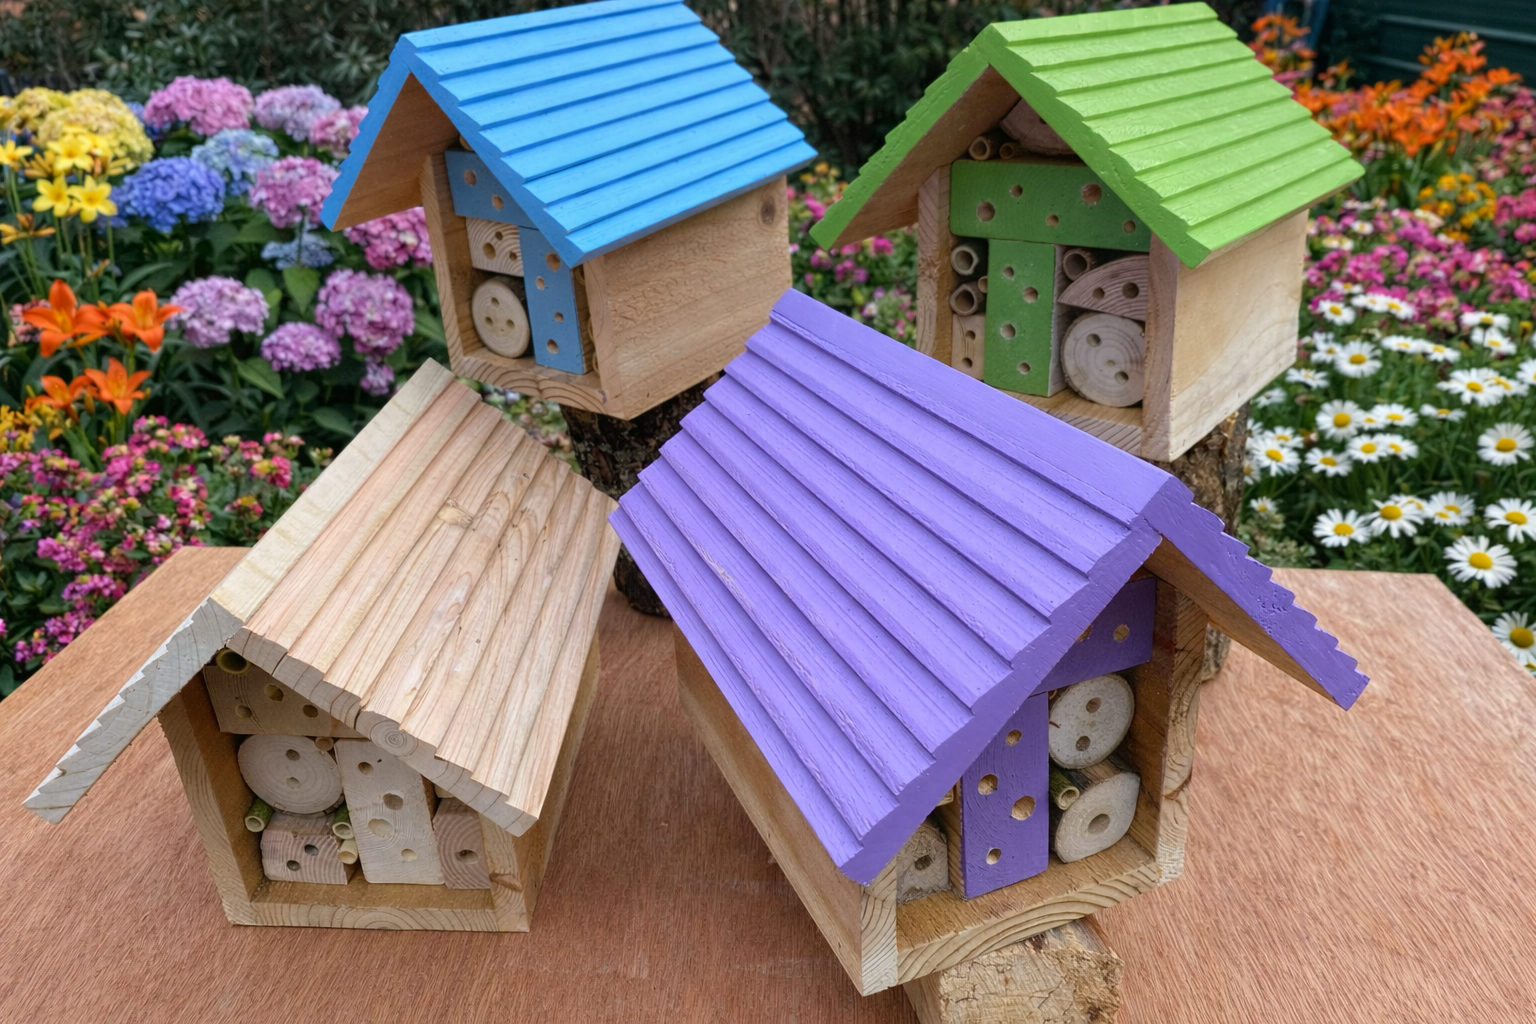
Part 1: Bee Hotel Design (The Outer Box) – Better Materials and Sizing
Gathering the right tools and materials will set you up for success. Start with a design that is built and sized correctly.
Hotels Designed for Bees Only and Proper Sizing
- Build bee hotels for bees, not other insects. Mixed insect habitats can lead to food and territory competition, as well as invite predatory insects that eat bee larvae. Stick with a box design and nesting materials made for bees.
- The size and shape can vary, but make the box deep enough for nesting material that is over 6″ in length. A good depth would be 8″. Keep each hotel small, containing no more than 100 nesting tunnels (a few dozen tunnels per box works best).
- Slope roofs to shed rain and overhang the front by 2″ to help protect the nesting material from weather.
- A drainage hole or two in the bottom of the structure will aid in removing trapped rainwater.
- Several smaller hotels throughout the garden are better than a single large hotel. Parasites and fungus are a common problem in poorly managed hotels and can quickly spread throughout a shared space. If that happens, you need to discard all nesting material in the whole box.

Outer Box Materials and Essential Tools
Choose natural, untreated wood like red cedar, which resists rot and pests. Avoid plastic hotels or PVC tubes that can become overrun with mold. Boards should be 3/4″ thickness to best protect bees from large predators like birds and rodents. Untreated pine can also be used but should be primed and painted inside and out. Choose an exterior latex paint with a low VOC rating of <100.
Using powered hand tools such as a skill saw, table saw and staple gun will make construction quick and easy.

Make the box sturdy by fastening with waterproof glue and galvanized staples.
Check out this bee hotel design from NC State University https://content.ces.ncsu.edu/how-to-manage-a-successful-bee-hotel/appendix-4-building-plans-for-a-simple-bee-hotel-shelter
Choosing a Location and Maintaining the Box
Place the finished bee hotel in a bright, sunny spot about 5 feet off the ground. Mount it on a fence post or the side of a building, with the openings facing east or southeast. This lets the morning sun warm the bees early in the day. At the same time, it helps to pick a spot that gets some afternoon shade.
If birds and rodents start to destroy nesting material, a metal screen made from hardware cloth or similar can be attached to the front of the box.
Though they can last for many years, inspected boxes for signs of parasitic mites, mold and fungus. Replace or sanitize them as needed. To sanitize an infested box, use one part household bleach to three parts water. Soak the box thoroughly and let it dry before adding fresh nesting material.
ENJOYING THIS POST SO FAR? MASH THAT SUBSCRIBE BUTTON.
Part 2: Nesting Materials – Sized Right and Replaced on Time
Choose nesting tubes and materials that are preferred by bees. Make tunnels the proper depth to ensure both male AND female eggs.
Using the Right Tools and Collecting a Variety of Healthy Nesting Materials
- Use materials that mimic what bees use in nature such as untreated wood, hollow stems, bamboo and hollow reeds. All tubes should be closed on the back. The natural node or joint of the stem will do. Avoid using plastic straws which develop mold and cardboard tubes which are prone to predators.
- If drilling holes in wood, use wood that has aged for several months and is dry. Properly dried wood is easier to drill, has less splinters and is resistant to splitting. Bees prefer maple and other hardwoods.
- Don’t drill all the way through, but leave the back end closed.
- Tools used to cut trees and stems: hand saw and chain saw.
- Tools used to drill tunnels in wood blocks: power drill, 9″ auger bits of different sizes.
- Tools used to cut bamboo: loppers, miter box saw.
- Sandpaper will smooth rough edges at tunnel entrances.


Making Tunnels That are Nice and Deep, and Sized Right
Tunnel depth should be around 6″ or more. The mother bee will lay female egg(s) in the back of the tunnel and fill the rest of the tunnel with male eggs. Adequate depth will ensure both males AND females.
Tunnel diameter should vary between 3.2mm – 12.7mm (1/8″ – 1/2″), to allow for different sizes in individuals and species. The majority of tunnels should be 9.5mm (3/8″). Position the tunnels 3/4″ apart.
To help bees locate their tunnel easily, stagger materials in length and vary in shape. Sometimes a few blocks are painted, too.
Replacing Used Material and Using an Emergence Box
After young bees leave the nest in spring, they may return to the same tunnel that they emerged from. While that is fine one time, used nesting materials should be replaced after one to two years.
Not all tunnels will be sealed to the end. Some are only partially filled but still contain eggs. It can be tricky determining when all bees have left and when it’s safe to replace nesting materials.
Replacing Nesting Materials
- One method is to remove the used nesting materials quickly after the bees have emerged in early spring. If you see bees entering the tubes again, they are already starting to build new nests.
- Alternately, an emergence box allows the young adults to fly out of their tunnels but makes it hard for them to return. A simple shoe box works fine, just punch a 1/2″ hole through the side near the top. But if you prefer a sturdier box, you can make one from wood.
How to Use an Emergence Box
- In winter, remove the nesting materials from the bee hotel. Place the nesting materials in an emergence box. Keep the box out of the weather and in a cold, dry place like a storage shed or covered porch.
- In late February or early March, refill the bee hotel with fresh nesting material. Locate the shoe box near the bee hotel to encourage the young bees to move into the hotel. Arrange the nesting materials so that the young adults can easily leave their chambers and make their way to the single exit hole. While waiting for bees to exit, keep the shoe box off the ground and cover the top to protect it from rain and wind. After all bees have emerged, discard the used nesting material and the shoe box.
Follow these key points: use natural materials for the box, make boxes strong and deep, make nesting tunnels 6″ deep, replace used nesting materials and tubes after one to two years. These bee hotel design tips will keep your bees happier and healthier.
Thanks for reading! – Christine


Leave a Reply